Tuesday, December 22, 2009

MG Strike Gundam + IWSP - Phase 03

Inner Frame snapshot

The assembly of the inner frame gives me the rough scale of how big this scale model turns out to be . The wonderful thing about joining up the limbs and torso pieces is that they can be disassembled for future purposes such as painting , transportation , posing(unlikely) etc.


I was fascinated with the big long sword that comes with this kit which is part of the reason I got this kit out of so many choices . The sword is probably shown in one of the side anime of the Gundam Seed Series and I have never seen it in action before . The sword can be folded backward but it does not seem to fit into any part of the IWSP system nor any other parts of the mecha itself other than carry it in the gundam's hands ....

Feet Assembly


The One gripe I have for these feet is that they can though the assembly seem very flexible, it is really only a 1 direction thingy : tilting the toes upward , no downwards . That's already some limitation in pose already .
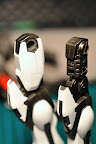

Hands


The hands are at MG best , movable thumb , index finger and the rest of the fingers as a whole . Only 1 plane of movement here . Only the Perfect Grade features the full movement of a real hand I think . I'm so getting those . . .
Still , the seperation of hand guard and the hand itself is a boon for painting .

Leg Assembly


Pretty sturdy legs I must say . 2 ball joints for the ankle to allow a teenee weenee bit more movement than the classic common HG single ball joint feet to leg. The biggest gimmick IMHO is the thigh armour plate inner frame assembly . The front plate sorts of slide "open" from the hind plate when the leg is bend at the knee .


The headless warrior

I must apologized as I am now skipping forward through the details of waist , chest , shoulders and arms assembly as I am practically losing patience . I am so tempted to see how all these actually turns out and man the number of parts are quite a killer.
Although I have organized them over and over countless times , hundreds are still hundreds (ok , sorry I exaggerated here) . It is tough trying to spray paint and saving paint at the same time .


Still I'm far from being done . There is only like 2 weeks left till 2009 is over and I really doubt I will be able to finish this kit by this year .


The chain gun shield + beam boomerang attachment

Kudos to the kit designer. The chain gun shield seems quite overwhelming in terms of size (it is nearly up to the shoulder of the gundam's height itself in length and pretty bulky ) . But the strike gundam hold up the gun with ease . It is really unlike any of the HG Kits that I have gotten before this . I must say it is even better than that of the MG RX-78 kit that I've got before this.


Thursday, December 17, 2009

MG Strike Gundam + IWSP - Phase 02

Ran out of black metal and steel colour spray . Dang . Bought another steel spray can and the shop don't have the black metal spray ! Sigh .
Flat black will have to do for now .
The spraying job seems never ending . Happily I thought I am done with the steel parts. And then I went back to the room and open the kit box and find more !!!
This is like the pain when running 2.4km .
The Tamiya P400 sand paper is good . Try it on the feet parts and seems to remove the nip mark pretty well .
Re-coated the red colour on the feet parts .
Shall finally able to assemble the full inner frame tomorrow .

Friday, December 11, 2009

MG Strike Gundam + IWSP - Phase 01

This is my 3rd Master Grade kit . I have a clear version RX-78 and a Patlabour Griffon before this , but none of them are painted or even fully finished . Procastination is the assassination of destination , or some say .
So this 3rd MG kit I am having quite a plan (or dream for that matters) . . .
I am going to paint it ! Fully detailed and decal , and apply final coat !
Nuff said , Let the fun begin !!
I am using the lazy method . Spray the surfacer on all the parts in their runner themselves .
Duh, it rains heavily suddenly, more than half of the runners haven't apply surfacer yet .

So just continue with the process . Sets up the pieces first . Surfacer can also be applied later . No Biggy .

For some instant gratification , I made the big sword first . This is one of those unusual Gundam which does not have beam sabers .

One blunder in Gundam making is that you will always have the urge to put everything together immediately once you cut out all the pieces . You want to see how everything fits together and you want to see your Gundam in action ! And only after that you realize some spots are hard to paint and you now have to take them apart , and half way in that process , ARGH , you snap a piece because they fit too tightly ! ( happens to my SD RX78 :....( )

Wednesday, December 2, 2009

Bakuz challenge entrees display @ Ngee Ann City Basement foyer

Now @ Ngee Ann City basement foyer, Takashimaya is holding its Xmas toy fair . There are 20% discount on its Gundam kits and tools. Also, there is a showcase of entrees pieces for the Bakuz 2009 challenge . I was kind of disappointed with the display as the glass cabinet is cramp, seems there are not many entrees to boot , and not to mention the poor layout of each piece.
There is no complete range of gundam model kits on sale : just the later ones from MG , Gundam 00 and SD Sango series . Fortunately it is not so important to me as I need to get only a couple of display stands and the bandai cutter.


Plan and Plan


Scope of my projects : SD strike freedom (above) vs MG Strike Gundam (below)


Black Metallic spray can level seems low . Probably should spray the MG first . . . . .

Saturday, November 28, 2009

Small Rest - Big Plan


Time to lay finger on the new kits which I bought from the Gundam fair at Compass Point , Seng Kang , couples of months ago. I thought I just want to fix up the 2 "eco-plastic" SDs and leave them be . I fixed up the zaku and spray a layer of semi-gloss top coat. I feel it won't do. It is still very "plastiky" which I don't really like. But I don't want to paint it up with color like the rest of normal kits . It won't feel unique anymore . So how?


Easy, I am going to paint it black !


Apply the surfacer , then the metallic black .

Tuesday, November 17, 2009

Painting HG Wing 0 custom - Phase 04


From Wing Zero Custom

Alas, I am done with this kit . It is still not fully touch up . And my idea of using gold ink as panel lines is not realized. Sigh.

From Wing Zero Custom

I used combination of 0.3mm mechanical pencil with 2B lead and a 005 thick ink marker to draw the panel lines .

From Wing Zero Custom

From Wing Zero Custom

Sunday, November 1, 2009

Painting HG Gundam Wing 0 - Phase 03


Panel lining is officially my worst nightmare in Gunpla-ing ! I still can't get it right ! Argh !!
I have done the lining for the lower body . Wings and arms to go . Damn those people make it look so easy , what's my problem then ?

Monday, October 26, 2009

Painting HG Wing 0 Custom - Phase 02

Put the parts on the sticks and sprayed the paint on each and every parts . Only the shield/head of the plane when transformed needs to do some masking . The rest of them are simply 1 color each . I have purposely bought the Steel and Metal Black color spray to try out and boy do they never ceased to surprise me .

WooHoo! Semi-assembled Gundam Wing O . Take a picture of it with most of my paint and tool kit. Just before I "destroy" the lovely frame with my sucky panel lining . *sigh. It's inevitable . . .


Tuesday, October 20, 2009

SD Exia


The thing about SD Gundams model kits : they are cheap , they are simple . So simple that most of the time 1 single piece contains many different color parts . The panel lining is no more simpler. And my skill in panel lining don't really help. Yet I'm quite satisfied with this outcome. Atleast now my SD Exia looks closer to something that resemble the anime rather that just cookie cutter plastic color.

Wednesday, October 14, 2009

Painting HG Wing 0 custom - Phase 01


It has been 9 years .
I have put it together out of the box for a long while . Didn't get to really paint it , till now .
After my 2 "successfully" painting with my SD 30th Anniversary RX-78 and Exia , I finally decide to get on with Wing 0.
Wing 0 has simple colour requirement : mainly white , classic Gundam blue and red , some gold linings , gun metal for metallic parts such as trusters and shoulder gattling guns .
Blue and Red spraying went well . For the red parts , I have applied the surfacer first , then on with the red paint (spray can). For the blue parts, I didn't applied the surfacer . Red parts are great . For the blue parts , it is not as bright n light as I thought it will be . This is probably because the base is already blue n the base colour some what affected the sprayed colour layer .
The white parts I actually tried to brush on the white surfacer .
It was quite disastrous.
The effect is no where near the sprayed surfacer .
I should get the white surfacer spray can and try over .
For the grey parts , I want to achieve the chrome metal effect .
Looks like another trip to the hobby shop soon.